
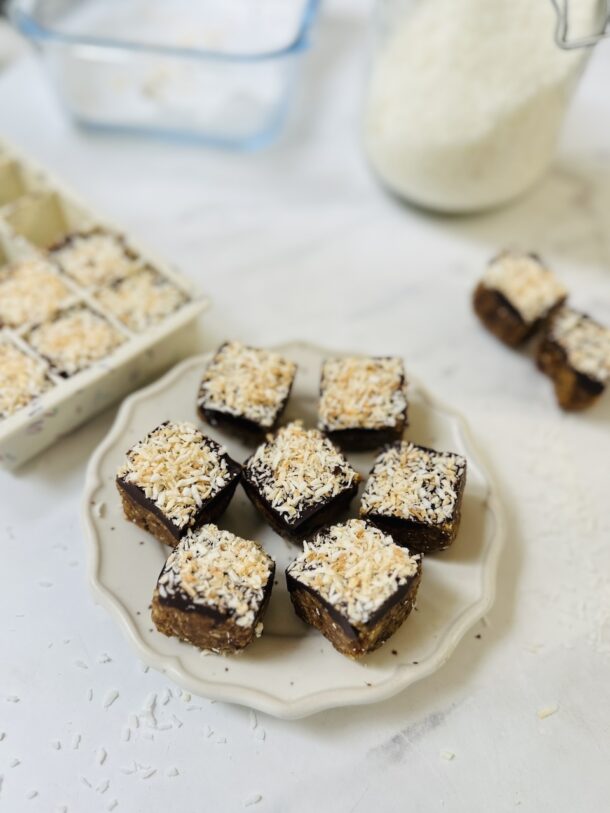
These pistachio and macadamia Chocolate Christmas Trees are super easy to make. They can also be frozen for easy make-ahead treats.
The filling is a gorgeous mixture of dates, nut butter and a selection of nuts and dried fruits.
If you don’t have the Christmas tree silicone tray then you can make them in any shape. Alternatively, roll into balls and dip in chocolate. They’re the perfect make-ahead Christmas treat.
Storage & Shelf Life
These chocolate Christmas trees will keep for about 7-10 days in the fridge.
Alternatively, you can freeze for 2-3 months.


REcipe tips
Which nuts and fruits you use in the filling is up to you. I like the festive colours of the pistachio and macadamia.
Make sure you use very soft medjool dates. Your filling may be too hard otherwise.
If you are looking for other easy Christmas ideas – check out my 12 Days of Christmas recipes.

Chocolate Christmas trees
Ingredients
- 200 g dark chocolate
- 1½ cups soft medjool dates (about 225g)
- ½ cup natural peanut butter (120g)
- 3 tbsp cacao powder
- 1 cup macadamia nuts (140g)
- ½ cup pistachios (65g)
- ⅓ cup freeze dried raspberries (15g)
Instructions
- Melt the chocolate in a bowl over a pan of hot water. Using about half of the chocolate, coat the bottom and sides of your moulds (use a pastry brush to fully coat up the sides). Refrigerate to harden for 10-15 mins
- Add the pitted dates, nut butter and cacao powder to a food processor and add 3 tbsp of water as you blend. It should be really soft and sticky but if it doesn’t seem sticky enough then add 1-2 tbsp of water and blend again.
- Chop the nuts and add them with the other ingredients to the food processor. Pulse to mix but don’t blend too much as you want chunks of nuts.
- Add the filling to the base of the trees and pour over the remainder of the chocolate. Refrigerate until hard.
Notes
- If you don’t have the silicone tree shaped moulds, you can roll out the mixture and use cookie cutters before dipping chocolate.
- Alternatively, the mixture is good just rolled into balls.


0 Comments